
Adding Signatures in Gmail is the best way to represent, Your, Company or the Business identity. Signatures are the Standard symbol of a business or a company email. Instead of making it super fancy and sending unstructured email is not a very good practice of professionalism. A structure is something that you always have to follow, no matter which industry you came from, what’s your highest qualifications are, but if you really wanted to dig into this professional environment then you need to learn that all. Not only that, signatures in Gmail are also a very healthy feature which saves your time by automatically include a few lines on the last row of your email, where usually people do write addresses.
The Signature can be anything here, you can set the address of workplace if you use to send the email regarding your work, if you are any kind of supplier then you can set your primary and secondary phone number there, etc. Similarly, if you used to send emails to your loved once only, through your Gmail account, then you can use such wishes & blessings quotes for that purpose.
Adding signature in Gmail makes sure that each and every mail you send through your account, will reach their destination with proper given structure.
Setting Up Signature in Gmail
In order to set up Signature in Gmail, You need to follow these simple steps:
- Open your browser and log in to your Gmail account.
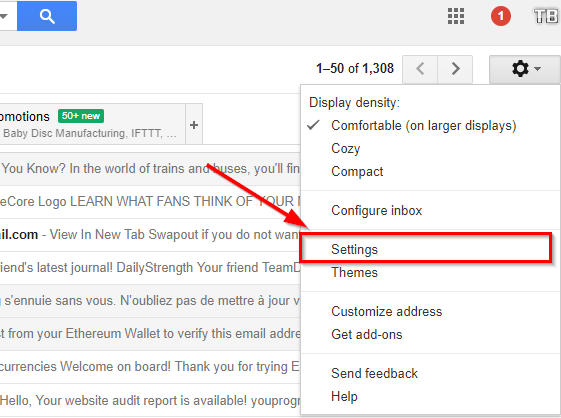
- Click on the Settings icon and click on Settings from the given list.

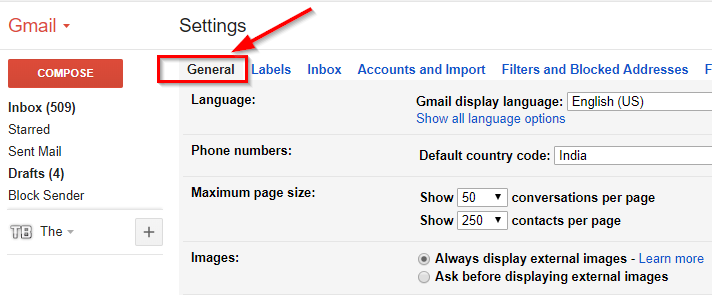
- Now you are in the settings window, you need to click General section.

- Scroll down below and find the option says Signature.

- Click the blank box in front of the Signature title, fill the desired signature there.
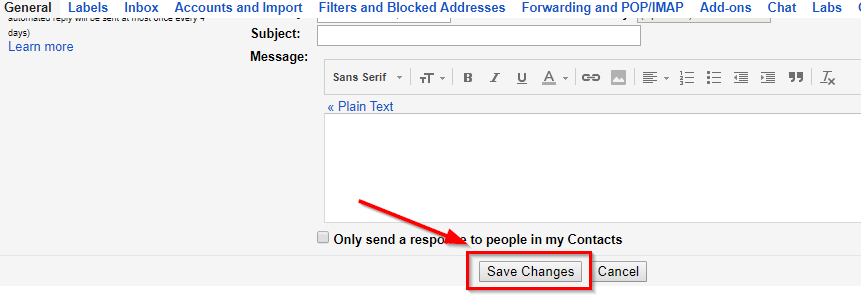
- Once you are done filling the signature box, scroll down and hit the save changes button.


Always remember to select the desired account in which you wanted to add a signature. So, if you have multiple Gmail accounts because of such popularity and being one of the best free email service provider, then you need to click the profile icon and choose the appropriate profile.
If really have no idea about what is the standard of adding a signature to your Gmail account then you need to know about this. Because the best ending makes the best effects.
Standard of Signature in Gmail:
These standards are only based on professional email signatures, but for general purpose, you can use whatever you want from the given options to make an attractive signature for all your emails.
- Always use Georgia, Verdana, or Arial Font which is considered to be as a professional font
- Use only Black color for the font. Don’t go for using different colors to make the written signature fancy.
- Making the signature font Bold is the best way to highlight.
- You shouldn’t use an image in the signature area.
- Don’t forget to mention Regards, only after that, you should put your name, address or phone number there.
These are the 4 quick but enough tips to make a professional looking signature.